Showing posts with label Learn Thai Food. Show all posts

Wednesday, February 23, 2011

Thai Coconut Rice

Coconut rice makes a terrific accompaniment to many Thai and Indian dishes, but it's equally wonderful with many Western-style entrees. Quick and easy to make, this coconut rice recipe will come in handy for those times when you want to make dinner extra special without going to a lot of extra work. ENJOY!
 
Prep Time: 5 minutes

Cook Time: 20 minutes

Total Time: 25 minutes

Yield: SERVES 4


Ingredients:

  • 2 cups Thai jasmine-scented white rice (for brown coconut rice, see link below)
  • 2 cups good-quality coconut milk
  • 1 3/4 cups water
  • 2 heaping Tbsp. dry shredded unsweetened coconut (baking type)
  • 1/2 tsp. salt
  • 1/2 tsp. coconut oil, OR vegetable oil
  • Optional: 1-2 Tbsp. toasted coconut for garnish (see instructions below recipe)

Preparation:

  1. Rub oil over the bottom of a deep-sided pot. You will also need a tight-fitting lid.
  2. Place rice, coconut milk, water, shredded coconut, and salt in the pot and set over medium-high to high heat. Stir occasionally to keep rice from sticking to the bottom of the pot and burning.
  3. Once the coconut-water has begun to gently bubble, stop stirring and reduce heat to low (just above minimum). Cover tightly with a lid and let simmer 15-20 minutes, or until most of the liquid has been absorbed by the rice. To check, pull rice aside with a fork. If most of the coconut milk-water is gone, go on to the next step.
  4. Replace the lid and turn off the heat, but leave the covered pot on the burner to steam another 5-10 minutes, or until you're ready to eat. Tip: Your Coconut Rice will stay warm this way for up to 1 hour or more, great for when you're expecting company!
  5. When ready to serve, remove the lid and fluff rice with a fork or chopsticks. Taste-test the rice for salt, adding a little more if needed. Serve right out of the pot, or transfer to a serving bowl. This rice is excellent served with a variety of both Thai and Indian dishes, such as curries or seafood recipes. If desired, top your rice with a sprinkling of toasted coconut and ENJOY!

Saffron Rice Recipe

This easy recipe for saffron rice hails from the south of Thailand, where it is often eaten with roast chicken. Saffron rice makes dinner extra special, and is nearly as easy to make as regular rice. You needn't own a rice cooker to make this recipe - it's boiled in a pot on the stove, but tastes very similar to steamed rice. And unlike most saffron rice recipes, this one is fat-free. Note: Because saffron is so expensive, I only use a little bit, then enhance the color by adding turmeric - a spice which also has incredible health benefits (in Thailand, turmeric is known as 'poor man's saffron'). Enjoy!

Prep Time: 2 minutes

Cook Time: 20 minutes

Total Time: 22 minutes

Yield: SERVES 4 as a Side Dish


Ingredients:

  • SERVES 4
  • 2 cups white Thai jasmine-scented rice, OR substitute white basmati rice (Note: brown rice is not successful with this recipe)
  • 3 1/2 cups good-tasting chicken or vegetable stock
  • 1.5 to 2 Tbsp. fish sauce, OR 1/4 to 1/2 tsp. salt if vegetarian/vegan (to taste)
  • 1/2 tsp. turmeric
  • 1/2 tsp. saffron threads
  • 1 clove garlic, minced
  • 1/4 to 1/2 tsp. dried crushed chili (from the spice aisle)
  • squeeze of lemon juice

Preparation:


  1. Pour stock into a medium-size pot (you will also need a tight-fitting lid). Place pot on the stove over high heat.
  2. While stock is coming to a boil, add the turmeric, saffron, garlic, chili, and a squeeze of lemon juice. Stir well.
  3. Add the rice, plus 1.5 Tbsp. fish sauce (or 1/4 tsp. salt) and stir. Bring to a boil, then reduce heat to low (just above minimum) and cover tightly with a lid. Cook 12-15 minutes, or until liquid has been absorbed by the rice. Tip: Insert a fork or knife straight down into the pot and push the rice aside. If you see liquid, it still needs more time to cook.
  4. When most of the liquid is gone, turn off the heat and place lid on tight. Allow the pot is remain on the burner another 5-10 minutes, or until you're ready to eat. The residual heat inside the pot will finish steaming the rice. The rice will stay warm in this way for 1 hour or more (great if you're having guests!).
  5. Before serving, remove the lid and fluff rice with chopsticks or a fork (some of the chili may have risen to the surface - just stir it back into the rice). Taste-test for salt, adding 1/2 Tbsp. more fish sauce or a little more salt if needed (how much will depend on the saltiness of your stock). If too salty, add another squeeze of lemon juice. See below for links to curry recipes and other Thai food that goes well with saffron rice. Enjoy!

Chicken Fried Rice (Khao Phad Kai)


Chicken fried rice is always a popular choice at mealtimes, both with kids and adults. But most homemade versions of fried rice don't taste nearly as good as those made in a restaurant. If you've found this to be the case, what you may be lacking are a few fried rice tips (included in this recipe). Make this dish as spicy or mild as you like, according to how much chili you want to add (it can also be omitted, especially if you're feeding kids). A super dish to eat on its own, this chicken fried rice recipe also makes a good basic accompaniment to other Thai/Asian recipes. Enjoy!

Prep Time: 20 minutes

Cook Time: 10 minutes

Total Time: 30 minutes

Yield: SERVES 2 as a Main Entree


Ingredients:

  • 4 cups cooked rice, preferably several days old (see recipe)
  • 1/2 to 1 cup cooked chicken or turkey, OR fresh (uncooked) chicken, cut into very small pieces
  • 1/4 cup chicken stock
  • 3 cloves garlic, minced
  • 1 minced green or red chili, OR 1/4 to 1/2 tsp. dried crushed chili
  • 2 Tbsp. fish sauce (plus more to taste)
  • 3 Tbsp. vegetable oil
  • 1/2 cup frozen peas
  • 1 egg
  • 3 spring (green) onions, finely sliced
  • 1/2 cup fresh basil OR coriander/cilantro

Preparation:

Tip: it's best to use "old" rice for this recipe. If using newly-cooked rice, put it in a large bowl and let it sit uncovered in the refrigerator for a few hours to dry it out.
  1. First, prepare cold rice by drizzling over 1 Tbsp. of the oil. Use your fingers to mix the oil in with the rice and separate the rice grains, removing any clumps.
  2. Place remaining oil in a large frying pan or wok over medium-high heat. Add garlic and chili. Stir-fry until fragrant (30 seconds to 1 minute).
  3. Add chicken plus 2 Tbsp. stock. Stir-fry enough to thoroughly warm the meat if cooked. If raw, stir fry until meat is well cooked (3-5 minutes). Add remaining stock, as necessary, to prevent the pan from becoming dry and to keep ingredients sizzling.
  4. Using a wooden spoon or spatula, push ingredients aside and crack the egg into the middle of the wok/pan. Stir quickly to cook and break up the egg (like making scrambled eggs).
  5. When egg is cooked, add the rice plus fish sauce. Stir fry, keeping the heat medium-high. Do not add any more stock/liquid at this point, or your rice will become soggy. You want it hot and dry and light-textured.
  6. Add frozen peas and continue to stir-fry another 2-3 minutes, or until you can hear the rice "popping". Cooking Tip: If you find the rice is sticking, push the rice aside and add a little more oil to the bottom of the pan - this will make the rice "shine", like restaurant quality fried rice.
  7. Do a taste-test for saltiness. If not salty or flavorful enough, add more fish sauce. If too salty for your taste (this will depend on the stock you used), add up to 1 Tbsp. fresh-squeezed lime juice.
  8. Sprinkle with spring onion and basil or coriander, and serve piping hot from the wok/pan. Thai chili sauce can be served on the side. Enjoy!

Wednesday, February 9, 2011

Stir fried eggplant with fermented soybean and minced pork (Ma-keua Yaao Pad Tao Jieow Moo Sap)

Stir fried eggplant with fermented soybean and minced pork (Ma-keua Yaao Pad Tao Jieow Moo Sap) is one of the rice side dishes that is popular for many Thai people to eat. Because the ingredients are easy to find, it is simple to make and it still tastes delicious. Thai Eggplant is commonly known as white eggplant. Even so, you will find that there are so many colors of eggplant including light green, dark purple, white, or dark purple mixed with white, etc. Eggplant has a lot of nutrition. Thai people often use it to make many dishes such as eggplant salad (Yum Ma-keua Yaao), pound eggplant (Tum Ma-keua), etc.

Ingredients
  • 2 eggplants, can use either green or purple eggplant
  • 150 grams (5 ounces) minced pork or minced chicken
  • 2-3 bunches of Thai sweet basil
  • 3-5 Thai fresh chili (Phrik Khee Nuu), take the stems off (depends on how spicy you like)
  • 2 cloves garlic, peeled
  • 1 Tbsp fermented soybean
  • 1 Tbsp soy sauce
  • ½ Tbsp fish sauce
  • 2 tsp sugar
  • 2 Tbsp vegetable oil
  • A little bit of salt
  • ¼ cup water

How to do…
1. Rinse the basil and the eggplants with water thoroughly. Drain the basil and pluck the leaves to set aside. Cut off the eggplants ends. Then chop the eggplants into an oblique shape about 1.5-2 inches thick (or cut in half lengthwise first and then slice crosswise into about 1 inch sized pieces each). Soak the sliced eggplant in water.  Add a slight pinch of salt into it, this will help the eggplants from turning dark.
2. Pound Thai fresh chili and garlic together just enough to be coarse, set aside.
3. Set the pan on medium heat. Add vegetable oil into the pan. When the pan is hot, put the pounded garlic and chili to fry until fragrant and then add the minced pork to fry until it is done. Then add the soaked eggplants into it (drain before putting it in).
4. Season with fermented soybean, soy sauce, fish sauce and sugar. Add ¼ cup water, stir the ingredients well together. Then put the lid on to cover the pan. Wait for the eggplants to cook for about 4-5 minutes and then open the lid. Stir again. Last, add the basil leaves. Fry until the basil leaves get soft. Turn off the heat, lift the pan off the heat and put the stir fry on the plate. (To stir fried the eggplant like this some places like to cook the sliced eggplants in hot water about 2-3 minutes prior to frying. When it is time to fry this will make the eggplants soft and cook quickly).

Ka-nom Tao Suan

Tao Suan is the name of a Thai dessert that originally came from China. It is made of boiled soybeans that have the shell removed and are then stirred together with flour paste and sugar. Then you pour the coconut milk on top. It has sweet, salty and nutty taste mixed together.

Ingredients
  • ½ cup split mung beans, or peeled mung beans (some people call soybean)
  • ½ cup concentrated coconut cream (this is the thick cream on the top of canned coconut milk)
  • 6-7 Tbsp sugar
  • 1 Tbsp tapioca flour or corn starch
  • ¼ tsp salt
  • ½ tsp rice flour
  • 2 cups water
How to do…
1. Wash the split mung beans with water thoroughly. And leave them to soak in the water for about 2-3 hours. When the time is over the beans will bloom all over the bowl. Then put the beans in a sieve and let the water drain.
2. Wrap the drained and split mung beans with a thin white cloth (cheesecloth is good) and put it in the steamer. Steam until the beans are done (it usually takes about 20 minutes).
3. While waiting for the beans to be cooked, it’s time to make the coconut milk for topping. Start by mixing the concentrated coconut cream with salt and rice flour in a pot first. Then put the pot over the low heat. Stir back and forth for about 1-2 minutes until the flour is cooked (careful not to boil). Turn off the heat and set it aside.
4. When the beans are cooked then pour them into a bowl. Shake the bowl lightly to make sure the beans won’t stay in a lump. Set aside.
5. Add 2 cups of water into a pot and put the pot over medium heat. Then add sugar, stir until all the sugar is melted (if anyone likes it sweet, add more sugar as you like).
6. Mix the tapioca flour with a little bit of water. Stir until the flour dissolves and does not stick together (putting tapioca flour into hot water directly is strictly prohibited, it will make the flour stick and clump together). When the pot starts to boil, then pour the flour mixture into the pot gradually while quickly stirring at the same time. Stir until it gets shiny and thick and then add the steamed mung beans. Stir until the beans are spread evenly in the pot then turn off the heat.
7. Scoop Tao Suan into a bowl. Put a little bit of coconut milk on top. Serve immediately, either hot or cold.

Tip: Do not skip the steps by adding the steamed mung beans into the pot before adding the tapioca flour. Because it will make the water get cloudy. The beans also will absorb all the water and make the beans bloom more. And when Tao Suan cools down could make the tapioca flour revert to the original form.

Monday, January 31, 2011

Grilled Pork Spicy Salad – Moo Yang Nam Tok

“Nam Tok” in the meaning from the Royal Institute of Thailand dictionary have 2 different meanings.  First, means the water that trapped in the mountain has fallen to the cliff.  Or we called the falling down water in a similar way that “Nam Tok – waterfall”.
The second meaning refers to one kind of food makes from meat like pork or beef. Then grill them until done, cut into thin pieces and season with grounded chili powder, chopped shallots, grounded roasted rice, lime juice, fish sauce, etc. Or using Nam Tok to call the noodles dish with fresh meat and fresh cow blood.  But today we will talk about Nam Tok as food, and use pork to be main ingredient.
Grilled Pork Spicy Salad – Moo Yang Nam Tok is one of the local food from the northeast(Isaan) of Thailand. People like to have this dish with sticky rice and grilled chicken. It has the ingredients and how to do as the following.


Ingredients
  • 450 grams pork (select the area that has small part of fat in it)
  • 3 medium sized shallots (peeled, washed and thinly sliced)
  • 3 Tbsp chopped green onion and coriander together
  • 1 cup mint leaves (use the leaves only)
  • 2 Tbsp fish sauce (or as your preference)
  • 2 Tbsp lime juice (or as your preference)
  • 1 Tbsp sugar (or as your preference)
  • 1 Tbsp soy sauce
  • 1 / 2 Tbsp oyster sauce
  • 1 Tbsp grounded dried chilli powder
  • 1 Tbsp grounded roasted rice
  • Water
  • Fresh vegetables such as cucumbers, cabbage, etc..


How to do…

1. Rinse the pork  thoroughly and dry with paper towel. Marinate the pork with ½ Tbsp sugar, oyster sauce and soy sauce for about  30 minutes or longer.
2. Place the grill on stove over medium heat. Grill the marinated pork for about 20 minutes on both sides totally. Prick the pork with a fork to see if the pork was medium rare cooked, then take it out and let it sit on the plate for a few minutes before start to slice into the thin pieces. That will allow the water from the pork not running out and the pork will get more juicy.
3. Put the sliced pork into the pot and set it on the stove over medium heat. Add a little of water just enough so it won’t get to dry. Stir well for about 2-3 minutes, then turn off the heat.
4. Season with seasoning ingredients such as fish sauce, lime juice, sugar (left), chilli powder, grounded roasted rice. Stir well and taste (add more as you like).  Then follow with shallots, green onion, coriander, and half of mint leaves (leave another half for garnishing).  Mix well again.
5. Put into the plate and garnish with the remaining mint leaves. Serve with fresh vegetables such as cucumbers, cabbage, etc. Enjoy your Moo Yang Nam Tok!

Fried rice with shrimp paste

Fried rice with shrimp paste is a traditional Thai food.  How to make it may be a little bit difficult because it has a lot of ingredients.  It has quite a few side dishes which will mean it takes a while to make everything, but it is so worth it.  Luckily, all the ingredients are easy to find anywhere.
The characteristic of fried rice with shrimp paste is light in color, has the taste of shrimp paste and very fragrant. The shrimp paste that we use has to be the good shrimp paste, it should be not very salty and not too dark in color. For the rice, you have to use old Jasmine rice (as opposed to new crop rice) and less water to cook because when the rice is cooked it should not come out too wet and it stays in the whole beautiful grain after cooking.
In the past Thai people liked to wrap shrimp paste with banana leaves. Then grill the shrimp paste wrap to make it more fragrant before mixing it with the cooked rice. Currently this is changing, instead people will put the shrimp paste into the pan that already has golden brown garlic in it, mixing the two ingredients together and then add the rice to mix.
The important sides of fried rice with shrimp paste that we can’t miss are fried dried shrimps, sweet pork, shredded omelet, thinly sliced shallots, thinly sliced chili, young mango, coriander, lime juice and cucumber. It’s totally your option which sides you add and you can certainly leave some out if they are not to your taste. Below are the details for making fried rice with shrimp paste on your own at home.


Fried rice with shrimp paste ingredients
  • 2 1/2 cup cooked rice
  • 1 Tbsp good shrimp paste
  • 2 Tbsp vegetable oil
  • 1 ½ tsp water
  • 3 cloves garlic, peeled and chopped


How to make fried rice with shrimp paste

1. Melt shrimp paste with water.
2. Heat the oil in the pan over medium high heat. When the oil is hot then add the chopped garlic. Fry garlic until yellow brown and fragrant.
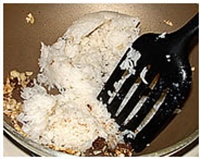
3. Add the melted shrimp paste to mix with fried garlic. Add the rice (divided into 2 parts, it will make it easier to mix the rice with the shrimp paste).
4. Stir rice and shrimp paste well, turn off the stove and set aside.

Side dishes ingredients
  • 2 eggs
  • 1/2 tsp soy sauce
  • 1-2 pieces Thai sausage (can find this at Thai, Vietnamese or Chinese grocery)
  • 1/4 cup small dried shrimp
  • Vegetable oil to fry shrimp and sausage
  • 2 shallots
  • 10 Thai fresh chili (phrik khee nuu)
  • 1/2 lime
  • 1 Cucumber (optional)
  • 3 long yard beans (in this case I will be using green bean instead because they taste the same and easier to find).
  • 2 tbsp chopped raw mango or 1 small green apple (in Thailand, we will use raw mango, once again I can’t purchase raw mangoes in the U.S. so I decided to use green apple that have the similar flavor instead).
How to prepare the side dishes


Eggs

1. Break the eggs, and beat well (do not beat until it is full) add soy sauce and beat well together again.
2. Put the pan over high heat. Add 1/2 Tbsp oil into the pan. Roll the pan around for the oil to coat the pan. When the pan is hot, pour eggs into the pan. Quickly tilt the pan around until the egg coats over the oily pan.
2. Leave it until the edge of the egg starts to peel off the pan easily. Then start to roll the egg out of the pan and put the rolled egg on the dish.
3. Cut the rolled eggs into the shreds (julienne style) and set it aside.


Fried sausage

Cut sausage on the oblique into 1 inch long pieces.  Put the pan over medium heat. Heat 2 Tbsp oil, and when it’s hot then fry the prepared sausages until they start to turn dark brown. Put it on the paper towel to absorb the extra oil.


Fried shrimp

Set the pan over medium heat. Heat 1 Tbsp of oil until it is hot then start to fry the dried shrimp. When the shrimp turns brown take it out and put it on the paper towel to absorb the extra oil.

Vegetables

1. Peel the shallots, take the stem off the chili, and wash them with water thoroughly.  Slice the shallots into thin pieces and chop the chili into the small pieces. Slice the lime into quarters and set them aside.
2. Wash apple and green beans thoroughly. Peel off the green apple skin and slice thinly. Then soak them in cold water mixed with ½ tsp of salt for about 5 minutes. Rinse them with water again and drain the water out (this will help to prevent the apple from turning black).
3. Cucumber, washed, peeled, and cut into oblique pieces. Green beans, washed and cut the edge of both sides off.  Then chop into small pieces. Put vegetables on the plate with the other side dishes. Prepare for serving.

Sweet pork ingredients
  • 5 ounces fresh pork side (also known as Chunk Side of Pork, Fresh Belly, Streak of Lean)
  • 3 Tbsp palm sugar
  • 3 Tbsp water
  • 1 1/2 Tbsp soy sauce
  • 2 tsp black soy sauce
  • 1 tsp seasoning sauce
  • 3 shallots, peeled and thinly sliced
  • 1 Tbsp vegetable oil
How to make the sweet pork


1. Wash the fresh pork side thoroughly. Try to select the meat part over the fat part. Cut into a small and thin pieces.
2. Heat the oil in the wok over medium heat. Fry shallots until they turn yellow brown and take them out from the wok. Save the remaining oil from frying in the wok.
3. Add the sliced fresh pork side into the wok (that already has oil in it).  Cook the pork for a few minutes. Add water into the wok and wait until it boils.  When the water starts to boil then season with black soy sauce, soy sauce and the seasoning sauce.
4. When the pork starts to get soft and the liquid is reduced by half, then add palm sugar. Mix and stir until the palm sugar dissolves and becomes dry, brown and sticky for another 15 minutes.  Then add fried shallots, stir and put them into a bowl. Hold for serving.

Tip: Palm sugar should be put it later from the other ingredients. If you add the palm sugar too early it will tighten up the pork and make the pork get so solid.

How to Serve the Fried rice with shrimp paste

Place the fried rice with shrimp paste on the plate. Place the side dishes including eggs, fried sausage, fried dried shrimp, shredded apple, sliced shallot, chopped green bean. For the sweet pork can serve separate in a small bowl or put on top of the rice depends on your preference. Then serve.

Sah-koo Sai Moo (Steamed Tapioca filled with Sweet Pork)

One of the Thai snacks that is often sold as a pair with Kow Gree-ap Pahk Mau (thin, flat steamed sweetmeat of glutinous rice flour) is Sah-koo Sai Moo (steamed tapioca filled with sweet pork). Sah-koo Sai Moo has a slightly sweet flavor mixed with a little salty. It is popular to have it with coriander, cabbage, and fresh Thai chili (Phrik Khee Nuu) to cleanse the oily taste. In addition it is the kind of food that is easy to eat, it is also simple to make, it does not require as much time and expertise to make as many other types of snacks.


Ingredients
  • 500 gram (4 ½ cups) tapioca granules
  • 250 gram (8 ½ ounces) minced pork
  • 100 gram (3 ounces) salted radish, finely chopped (washed and drained)
  • ¼ cup onion, finely chopped
  • 1 cup roasted peanuts, coarsely pounded
  • 1 Tbsp coriander root, finely chopped
  • 4 Tbsp garlic, peeled and coarsely chopped
  • 1 tsp pepper seed
  • ½ cup palm sugar
  • ½ Tbsp fish sauce
  • ½ Tbsp soy sauce
  • ½ Tbsp seasoning sauce
  • ½ -1 tsp black soy sauce
  • ¼ cup vegetable oil
  • 1/3 cup hot water
  • Fresh vegetables for side dish such as cabbage, coriander, fresh Thai chili (Phrik Khee Nuu), etc.
  • Cheesecloth to place on the Chinese utensil steamer before steaming


How to do…

1. Rinse Tapioca granules with water thoroughly. Drain the water out with a strainer. Then add into a mixing bowl. Gradually add hot water into it, stir well, then cover with damp cheesecloth for about an hour. Later, thresh the tapioca until it becomes sticky and homogeneous. Then mold the tapioca into small ball shapes about ½ -1 inch in diameter. Set them aside.
2. Add the oil into the pan. Place the pan over medium heat until hot. Add 3 Tbsp chopped garlic to fry until yellow (careful not to burn), then scoop them out and set aside.
3. Pound coriander root, the remaining garlic, and pepper seed together util thoroughly fine.
4. Place the pan over medium heat. Add the remaining oil from frying the garlic 2 Tbsp into the pan. Wait until the oil is hot then add the pounded ingredients to fry until fragrant. Add chopped onions and minced pork to it. Stir fry the pork to be dispersed. Follow with chopped salted radish. Then season with palm sugar, fish sauce, soy sauce, seasoning sauce, and black soy sauce. Stir well. Taste to ensure it is salty and sweet. Add the peanuts. Stir fry together until becomes sticky. Turn off the heat. Lift it down and let it cool.
5. Start to wrap by spreading out the tapioca ball into a thin sheet. Put the filling in the middle. Then wrap it up completely with tapioca sheet. Then lay them down on the tray.
6. Place the cheesecloth down in the steamer. Lay the tapioca filling on the cheesecloth with a space approximately 1 cm on each side of each ball (provide for the steamed tapioca will expand). Then lift the steamer to boil in the boiling water and high heat about 10-15 minutes or until done then lift it down.
7. Place steamed tapioca filled with sweet pork (Sah-koo Sai Moo) onto the plate. Sprinkle with fried garlic. Serve with cabbage, coriander, and fresh Thai chili.


Tips

Whether Sah-koo Sai Moo will be delicious or not depends on “the filling” having a mellow flavor, salty to lead and sweet to follow. And the tapioca must have the right consistency and stick together well, not too gummy so that it sticks on teeth or gums when chewing. In addition to pork, the filling can be changed to something else instead, such as chicken, shrimp, fish or vegetables, etc.
While stir frying the filling please be calm and cool, gradually continue to stir until the filling grips and sticks together well. The salted radish that you use, if it is very salty then it needs to be washed with water before chopping to reduce the saltiness. The peanuts that you use, they need to be roasted to be fragrant before pounding. And you must not pound too fine or too coarse. If pounded too fine, when you eat will not feel like you are eating the peanuts that are mixed in. In addition, the proportion of Sah-koo (tapioca) and the filling should about equal. Not like more tapioca and less filling. Or less tapioca and more filling and make the tapioca pierced.
You should dip your hands into the water every time you spread the tapioca and mold it into the ball to prevent the stickiness of tapioca on your hands. If you prepare by molding the filling beforehand, that will help you to mold Sah-koo Sai Moo faster. Avoid molding it too big. Because when you steam them the cooked Sah-koo Sai Moo will expand more.
Good Sah-koo Sai Moo when it is cooked, the tapioca must clear. If there is any white spots in the starch it shows that the Sah-koo is still raw yet. To steam Sah-koo Sai Moo is need to steam with boiling water in high heat. It takes approximately 10-15 minutes to be done (depends on the size of the tapioca (Sah-koo) too).

Deep Fried Banana (Gluay Khek or Gluay Tod)

Gluay Khek (Deep fried banana) is one of the Thai desserts, which is prepared by slicing bananas and then dipping them in flour and frying until golden brown. The ingredients are rice flour, scraped coconut, sesame seeds (need to be roasted before using to make them more fragrant), sugar and coconut milk, etc. Then deep fry it in a pan with hot oil.


Thai people like to have Gluay Khek (Deep fried banana) as a snack. Gluay Khek usually can be seen for sale on the footpath or vendor street in any community generally.


Ingredients
  • A handful of half-ripe Musa Sapientum banana (Gluay Nam Wa), or approximately 10-12 fruits (these are the small Thai banana)
  • 1 cup rice flour
  • ¼ cup wheat flour
  • ½ tsp salt
  • 1 tsp baking powder
  • 2 Tbsp roasted white sesame seeds (or more according to your preference)
  • ½ cup scraped coconut (white part)
  • ½ cup palm sugar
  • ¼ cup lime water
  • ½ cup concentrated coconut cream
  • 3-5 pandanus amaryllifolius leaves (Bai Toie), wash thoroughly and cut in half
  • 3 cups vegetable oil for frying
How to do…

1. Peel the Musa Sapientum banana and slice it lengthwise into thin pieces, each fruit should be cut into at least three or four pieces.
2. Mix rice flour, wheat flour, salt, baking powder, palm sugar, roasted white sesame seeds, scraped coconut, lime water, and concentrated coconut cream together in a large bowl. Stir until flour and palm sugar dissolve well and until all ingredients are mixed well.
3. Pour the vegetable oil into the frying pan and set it on high heat. Wait until the oil is hot. Put the cut pandanus amaryllifolius leaves to fry in the pan for the fragrance. Then scoop them out.
4. Dip the prepared banana from step one into the mixing flour. Take the pieces of banana that have the mixing flour covering the entire pieces to fry in the pan. Fry until cooked, golden and crisp (the cooked bananas will be rise). Turn the bananas while frying too. Then scoop the cooked bananas out to drain the oil.
5. Put and organize the deep fried bananas on the plate. Serve them as a snack or an appetizer.

Tip : A delicious deep fried banana will usually use the Musa Sapientum banana (Gluay Nam Wa) that is not completely too green or too ripe to cook. And when frying them you must fry in the hot oil so when the bananas are cooked then they will turn golden brown and delicious. The taste of deep fried bananas that you get will be sweet, fatty and have a sweet smell. It will have the crispness from the flour that covered outside and inside will be soft with banana meat.
Note : The banana that is used to make more delicious deep fried banana than Musa Sapientum banana is Musa (ABB group) banana (Gluay Nang Ya or Gluay Nang Phaya) from the South of Thailand. If cannot find these then may be use the other types of bananas such as Musa (AA group) bananas (Gluay Kai), Musa (AAA group) bananas (Gluay Hom) or Musa Sapientum banana (Gluay Nam Wa) to cook instead. Or you can even use taro and sweet potatoes to cook instead of banana. But for taro and sweet potatoes, flour and fry them after peeling the skin off. They also need to be washed first. Then cut them into pieces about 0.5-1 cm thick.

Chinese Chive Flowers with Shrimp - Pud Dok Gui Chai


1            teaspoon                  sugar
1lbshrimp
1clovegarlic, chopped
1 1/2tablespoonsfish sauce
3/4lbChinese chive flowers, cut

Chop garlic. Cut the Chinese chive flowers into 1 1/2 inch long. Peel and devain shrimp. For a presentation, you can use whole shrimp (with head) and peel.
Heat a wok or a pan on high heat. Add a tablespoon of oil and chopped garlic and stir. Add shrimp when the garlic starts to brown. Stir to get the shrimp somewhat cooked. The shrimp shoud start to get pinky but not all pink or cooked. Add the chive flowers and stir to cook them. Add fish sauce and sugar. The flowers shouldn't take long to cook. You want the flowers to just cook, but not overcook and still retain their crunchiness. When the color turns bright green, it indicates that they are cooked. Turn off the heat and pour on a plate immediately.
Serve with hot with rice.

Friday, January 28, 2011

Kai Pa Loh – Eggs Stewed In Gravy

Pa Loh is a kind of Chinese food, which consists of boiled eggs, tofu, pork and uses Chinese Star anise, cinnamon and other spices to pound and mix well together, and is then stewed until almost dry. It could use either duck or goose as the main protein. Pa Loh has a sweet and salty taste, it is a flavor from stewing the palm sugar, soy sauce and fish sauce. Pa Loh is also called by the type of protein that the dish is made with such as Kai Pa Loh – Eggs Stewed, Bped Pa Loh – Duck Stewed, and Moo Pa Loh – Pork Stewed, etc.


Ingredients
  • 7 eggs or can use duck eggs also (In this case I can not find duck eggs so I use regular eggs instead)
  • 500 grams (1 pound) streaky pork (aka back bacon)
  • 10 pieces dice sized Tofu, fried to inflate (optional item)
  • 4 Tbsp white soy sauce
  • 4 Tbsp fish sauce
  • 1 Tbsp black soy sauce
  • 250 grams (8 ounces) palm sugar
  • 1 Tbsp salt
  • 3 Chinese Star anise
  • 2 pieces Cinnamon, 2 inches long each
  • 1 tsp Cumin
  • 2 Tbsp vegetable oil
  • 1 Tbsp coriander root
  • 3 large cloves garlic, peeled
  • 1 tsp Pepper seed
  • 1.5 liters (6 cups) water
  • 2 stems coriander, coarsely chopped for garnishing
How to do…
1. Rinse eggs thoroughly. Add water and salt into the pot and put on the stove over medium heat. Boil the eggs in that pot until they are cooked and turned to hard boiled eggs. It usually takes about 10-12 minutes. Then lift the pot off from the stove and drain the water out. Soak the cooked eggs in cold water and peel off the shells. (Putting a little bit of salt into the water while boiling the eggs will help with shucking the egg shells, and make the shells come off easily).
2. Rinse the streaky pork thoroughly. Prepare the pork by cutting it into rectangular pieces approximately 1.5-2 inches thick.
3. Pound coriander root, garlic and pepper seed together until fine.
4. Turn on the stove to medium heat. Add the oil into the pan and wait until the oil turns hot. Then add pounded coriander root, garlic, and pepper into the frying pan, stir fry to fragrance (1-2 minutes).
5. Add palm sugar into the pan and stir until it melts down. Follow with prepared streaky pork, hard boiled eggs, fish sauce, black soy sauce, and soy sauce.  Stir well together.
6. Transfer everything into a 3 or 4 quart pot. Add 1.5 liters of water, Chinese Star anise, cinnamon, and cumin. Wait until the water starts to boil then lower the heat down to low heat. Stew for about 45 minutes then turn off the heat and lift the pot off the burner.  In case that you want to add fried tofu in your Pa Loh, please add in 15 minutes before turning off the heat.
7. Put Pa Loh into a bowl, garnish with chopped coriander and serve.

Khao Man Gai Tod

Previously, I had already presented you with the Khao Man Gai (chicken with rice) recipe. And then I got a comment asking about how to make Khao Man Gai Tod (Fried Chicken with Rice). Therefore, I went to search for the recipe for you all to try, to make and to eat. Ingredients and how to make Khao Man Gai Tod (Fried Chicken with Rice) are simple as follows.


Ingredients
  • 2 pieces chicken breasts (using the boneless ones)
  • 1 cup all purpose flour
  • 1 cup breadcrumb
  • 1 egg
  • ½ Tbsp soy sauce
  • ½ Tbsp seasoning sauce
  • ½ Tbsp oyster sauce
  • 1 tsp sugar
  • ½ tsp ground pepper
  • A pinch of garlic powder
  • A pinch of coriander powder
  • A pinch of ground red pepper
  • Vegetable oil to fry
How to do…
1. Wash the chicken breasts with water thoroughly. If the chicken is very thick, then cut chicken into pieces lengthwise about 1.5 – 2 cm thick and then put them in a mixing bowl.
2. Add soy sauce, seasoning sauce, oyster sauce, sugar, pepper, garlic powder, coriander powder, and red pepper into the mixing bowl. Mix well. Then put the marinated chicken in the fridge for an hour. If you have more time you can let it sit overnight (the mixture will absorb into the meat more).
3. Crack the egg into a bowl, then beat to rise. Before frying, dredge the marinated chicken in the all purpose flour. Lightly pat the excess flour off. Then dip the chicken into the beaten egg. Finally dredge the breasts in the breadcrumbs thoroughly.
4. Place the wok with oil in it over medium heat. Wait until the oil is hot enough to put the chicken down to fry. Fry about 10-14 minutes until chicken is cooked, browned and floating. Then take them out and drain the oil. Wait to serve with rice and the sauce.


The Khao Man Gai Tod sauce (Fried Chicken with Rice Sauce)

Ingredients
  • 4 large red Capsicum frutescens (Solanaceae) or Prik Chee Fah in Thai (will be dividing them into 2 parts: 3 of the chilies will be cut lengthwise along the grain and use the spoon to scrape the seeds out. The remaining one will be used as the whole chili to provide moderate spiciness).
  • 3 cloves garlic (peeled)
  • ½ -1 Tbsp water garlic pickled
  • ½ cup vinegar
  • ¼ cup sugar
  • 2 tsp salt

How to do…
1. Put the chili, garlic, vinegar, water garlic pickled, and salt into the blender. Then blend until everything is mixed well and fine.
2. Pour the blended ingredients into a pot and place it on the low heat. Simmer to boil. Then add sugar, stir until dissolve and simmer for another 10 minutes to allow water to evaporate. Then will get the sauce that has a stronger taste and is a bit more sticky.
3. Turn off the power. Lift it down and let it cool.

How to serve Fried Chicken with Rice


Chop the fried chicken into bite sized pieces and on top of the rice. (How to make the rice, you can go and visit the Chicken and Rice page from previously). Garnish with coriander leaves. Serve with cucumber obliquely sliced, the sauce and soup.

Thursday, January 27, 2011

Boiled rice with pork

Boiled Rice is a dish made from rice as you might guess; how to make boiled rice is pretty similar to cooking rice with a regular pot. The difference is when making boiled rice we will add more water than when cooking rice.  The timing to make boiled rice is similar to cooking rice also, or sometimes may be longer.


There are several types of boiled rice like plain boiled rice and boiled rice with pork. In some countries, people could use oat, wheat, barley or boil the rice in milk too. If cooking boiled rice for a long period of time it will become what we call “Joke”.


Joke is a dish made from cooking rice and water until the rice becomes fine and there is no shape of the rice grain left.  This dish (or variations) are popular in many Asian countries. Joke is eaten in some cultures as breakfast or dinner as the main course. Joke is able to be cooked in a regular pot or rice cooker. In some countries, it is considered that rice and Joke are the same foods.
Type of boiled rice
Plain boiled rice is a plain white rice boiled and tasteless dish.  Usually eaten with other dishes like salted egg, etc.
Boiled rice with pork is similar to plain boiled rice, but boiled rice with pork will have pork bones added to it, so that this kind of boiled rice typically tastes better.
Three kings boiled rice is a type invented by Rama V during his travels throughout Thailand. It is similar to how to make boiled rice with pork, but instead of adding pork we add mackerel, squid and shrimp into it.
Today we will present you boiled rice with pork. It has ingredients and how to do as follows.
Ingredients
  • 2 cups jasmine rice
  • 7 cups water
  • 200 grams (about 7 ounces)  pork bones
  • 200 grams (about 7 ounces) minced pork
  • 10 cloves garlic, peeled and pounded
  • 3-4 shallots, peeled and thinly sliced
  • ½ cube Knorr cube or 1 ½ tsp Rod Dee powder– pork flavor
  • 3 Tbsp soy sauce
  • 2 Tbsp vegetable oil
  • ¼ cup of (each) chopped coriander, chopped green onion, and chopped Thai Celery
  • Ground black pepper for garnishing
How to do…
1. Place the pot with water and the pork bones in it over medium heat. Wait until the water starts to boil.  If there is foam that starts to form on the surface please scoop it out. The foam will give your broth a bitter taste if you leave it in there.  Then let it boil again for about 20 minutes.
2. Reduce the heat down to low heat. Add jasmine rice, follow with 2 Tbsp soy sauce and Knorr cube or Rod Dee (pork flavor). Let it simmer for about 15 minutes. Please stir from time to time otherwise the rice will be burnt and stuck on the bottom of pot.
3. While waiting for the rice to cook. Heat the oil on the pan over medium heat until it hot. Add sliced shallots to fry, when they turn amber yellow, put them aside on the paper towel to absorb the oil.
4. Use the remaining oil after frying the shallots to fry the garlic. Once the garlic starts to turn yellow add the minced pork and the remaining 1 Tbsp soy sauce. Stir fry until the minced pork turns dark brown and dry. Put the cooked ingredients into the boiled rice pot. Stir well, continue until the rice cooks well then and is tender (about 3-5 minutes) and then turn off the stove.
5. Put the boiled rice into a bowl, sprinkle with fried shallots, coriander, green onion, Thai celery, and ground black pepper.
6. Serve hot (this type of boiled rice, it should be eaten immediately after it’s done. If you wait too long the rice will become so sticky and absorb all the soup and it won’t be as tasty as it should be).  Mix everything together well and taste, if not salty enough then add more soy sauce as you like.

Tod Mun Plah Grai (Fried Fish Cake Thai Style)

Tod Mun Plah Grai (Fried Fish Cake Thai Style) is another popular recipe for those who like to have fish. In addition to being easy to find to eat and for sale in a busy general community area Tod Mun Plah Grai is also an easy dish to make on your own at home. Or if inconvenient to make it yourself, you can buy it pre-made and then fry it yourself.


How to make Tod Mun Plah Grai so tasty and delicious, here are some tips and steps to do.
Ingredients
  • 300 grams (10 ounces) Notopteridae fish meat (you can substitute any mild white fish), crushed or finely chopped
  • 3 Tbsp red curry paste
  • 1 cup long yard beans, finely chopped
  • 5 kaffir lime leaves, finely sliced
  • 1 egg
  • 1 Tbsp fish sauce
  • 1 Tbsp sugar
  • ½ tsp salt, bring to thawed in 1 Tbsp ice cold water
  • Vegetable oil for deep frying
How to do…
1. Bring the Notopteridae fish meat, red curry paste, long yard beans, kaffir lime leaves, and egg to mix and knead together until sticky.
2. Season with fish sauce, sugar and salted water and knead until sticky and well mixed.
3. Add the vegetable oil into the wok and place it on medium heat. When the oil is hot then reduce the heat to low. Then put the Tod Mun in to fry, by making it into a thumb sized ball and spread it out into a flat disk about 1 cm thick and 1 ½ -2 inches in diameter. Fry until it cooks and turns golden on both sides. When it is cooked, scoop it up to drain out the oil. Arrange on a plate and serve with the sauce.

The sauce ingredients
  • ½ cup Thai sweet chili sauce
  • 2 small cucumbers
  • ½ -1 tsp pounded fresh Thai chili (depends on whether you like more or less spicy)
  • 2 Tbsp grounded roasted peanuts (optional, depends on your preference)
  • 2 coriander stalks, coarsely chopped

How to do the sauce…
1. Wash cucumbers with water thoroughly. Then cut in half lengthwise and thinly slice crosswise.
2. Add Thai sweet chili sauce into a mixing bowl. Follow with cucumber, fresh Thai chili, peanuts and coriander. Stir well. Then serve with Tod Mun.
Tip
Immerse the bowl that holds the Tod Mun mixture in crushed ice or refrigerate it over night. And then fry it the next day, so this will allow Tod Mun to inflate, rise, and look delicious.

Laab Moo E-sarn (Minced Pork E-Sarn style)

Laab E-sarn is one of the excellent dishes on many Thailand restaurants menus. Though I haven’t mentioned about the restaurants in general yet, there is Laab E-sarn to be found throughout Thailand. Even the stalls, hawkers and peddlers, or even the cart food will have “Laab E-Sarn” to sell as we can see. So today we will have the recipe for Laab E-sarn that is made with minced pork to present.


Ingredients
  • 350 grams minced pork
  • 1 cup chicken broth or water
  • 2 Tbsp mint leaves, coarsely chopped
  • 2 Tbsp coriander, coarsely chopped
  • 3 Tbsp green onion, finely chopped
  • ½ cup shallots, finely chopped
  • 3 Tbsp lime juice
  • 2 Tbsp fish sauce
  • 2 Tbsp grounded roasted rice
  • 1 Tbsp chili powder
  • ½ tsp sugar
  • Fresh vegetables for side dishes such as cabbage, long yard bean or cucumber


How to do…

1. Boiled chicken broth or water in a small pot. When water starts to boil, add the minced pork and let it boils for another 2 minutes. Use the rake to separate the pork while it’s boiling. When pork is cooked, then turn the heat off and pour the water out.
2. Put the cooked pork into the medium mixing bowl, add shallots, green onion, coriander and mints (leave a little bit of mint for garnishing). Season with lime juice, fish sauce, grounded roasted rice, chili powder and sugar. Mix well. Taste and add anything as you like.
3. Put the Laab Moo on the plate and also garnish the side dishes with fresh vegetables (cabbage, long yard bean or cucumber). Sprinkle with mint leaves. Serve with hot sticky rice (or steamed rice).

Note : For some people who like pork organs, you can use them as one of the Laab Moo (minced pork) ingredients too. You simply slice the organs into thin pieces and then scald them until done prior mixing them with all of the Laab Moo ingredients.

Sunday, January 23, 2011

Homemade Thai Barbecue Sauce Recipe


Next time you have a barbecue or cookout party, instead of purchasing a store-bought barbecue sauce, try this superior homemade barbecue sauce recipe! Homemade barbecue sauce is easy to put together, and it's far less expensive than the store-bought variety. Plus, it tastes better and is much healthier for you! My easy Thai barbecue sauce can be whipped up in just minutes. Then slather it on any type of meat or fish. Makes excellent barbecue chicken, or chicken wings for the kids!

Prep Time: 8 minutes

Total Time: 8 minutes

Ingredients:

  • This Recipe Makes Enough Barbecue Sauce to Serve 2 Adults (Double the Recipe for 4 or More)
  • 1/4 cup liquid honey
  • 2 thumb-size pieces of ginger or galangal, minced or grated
  • 2 Tbsp. fish sauce (available in tall bottles at Asian/Chinese food stores)
  • 1/4 cup soy sauce
  • 1 tsp. dark soy sauce (available at Asian/Chinese food stores)
  • 3 cloves garlic, minced, OR 1 tsp. bottled pureed garlic
  • 1-3 red or green chili peppers, de-seeded/minced, OR 1-3 tsp. chili sauce (omit for very mild sauce)
  • 1/4 tsp. black pepper
  • juice of 1/2 fresh lime (about 1 1/2 Tbsp.)

Preparation:

  1. Place all ingredients in a bowl and stir well. OR, place all ingredients in a food processor. Process well to form a smooth sauce.
  2. Pour over the meat, chicken, or fish you plan to barbecue. Be sure to turn the pieces in the sauce so that all the flesh has been saturated with sauce.
  3. Allow to marinate at least 20 minutes (while you warm up the barbecue or grill), OR up to 24 hours in advance (simply cover the meat and place in the refrigerator overnight, until you're ready to cook).
  4. While barbecuing, baste the meat once on each side for increased flavor and tenderness.
  5. If desired, make extra sauce and keep it aside (separate from the meat) until you're ready to eat. Then quickly warm it up and serve as a dipping sauce, glaze, or just to spoon on top as you eat. ENJOY!
Cooking Tip: Because this barbecue sauce is fairly sticky (that's what makes it so good!), I find it helps to oil the grill before cooking. Simply dip your basting brush in a little cooking oil and brush over the grill before cooking. This also keeps the meat from sticking too much, making turning easier.

Thai Peanut Sauce/Dip/Marinade


While most Western versions of peanut sauce are made with peanut butter, this Thai peanut sauce recipe starts with real peanuts - and you'll taste the difference! At the same time, it's super easy and quick to make. This peanut sauce can be used for a variety of purposes, from a dip for veggies to a sauce for chicken or beef satay. Or use it to make a yummy cold noodle salad or as a marinade for grilled chicken or tofu. A very easy and versatile peanut sauce recipe.

Prep Time: 15 minutes

Total Time: 15 minutes

Yield: SERVES 4-6 as a Dip

Ingredients:

  • 1 cup fresh-tasting dry roasted peanuts, unsalted
  • 1/3 cup water
  • 2 cloves garlic, minced
  • 1/2 tsp. dark soy sauce
  • 2 tsp. sesame oil
  • 1/2 to 2 Tbsp. brown sugar, to taste
  • 2 to 2.5 Tbsp. fish sauce - for vegetarians: substitute 2.5 to 3 Tbsp. regular soy sauce
  • 1/2 tsp. tamarind paste OR 2 Tbsp. lime juice
  • 1/2 tsp. cayenne pepper, OR 1 tsp. Thai chili sauce (more or less to taste)
  • 1/3 cup coconut milk

Preparation:

  1. Place all ingredients in a blender or food processor. Blend or process until sauce is smooth. If you prefer a runnier peanut sauce, add a little more water or coconut milk.
  2. Do a taste test, adding more fish sauce (or soy sauce) if not salty enough, or more cayenne if not spicy enough. If too salty, add a squeeze of fresh lime juice. If you'd prefer it sweeter, add a little more sugar.
  3. Serve warm or at room temperature with my Thai Chicken Satay, as a dip with fresh veggies, with fresh spring rolls, or other Asian finger foods. Or combine with noodles to create a Thai-style noodle dish or cold noodle salad. Enjoy!
Note: This sauce tends to thicken as it sits - just add a little water or coconut milk to thin it out, as needed. Otherwise it stores well if kept covered in the refrigerator (keep up to 2 weeks; freeze thereafter).

Thai Chili Sauce 'Nam Prik Pao'


Although you can buy the famous Thai chili paste "nam prik pao" in most Asian food stores, I prefer making my own homemade version. This way there are no preservatives and I get to add my own healthy oil. There are numerous versions of homemade nam prik pao in Thailand - each cook makes it his or her own way. So have fun experimenting with this (my own) recipe, adjusting the spicy, sour, sweet, and salty flavorings according to your liking. Nam prik pao chili sauce makes an excellent accompaniment for soups such as Tom Yum Kung, and is an absolute must with noodle dishes. ENJOY!

Prep Time: 10 minutes

Cook Time: 8 minutes

Total Time: 18 minutes

Yield: 1 small jar

Ingredients:

  • Makes a small jar of Nam Prik Pao - about 1/2 cup (a little goes a long way!)
  • 1/4 cup canola or coconut oil, plus a little more to finish (or light vegetable oil of your choice)
  • 4 cloves garlic, finely chopped
  • 2 shallots, finely chopped
  • dried whole OR crushed red chilies, ground to make 3 Tbsp. powder (*If you have a sensitive stomach, use cayene pepper)
  • 1/2 to 1 tsp. shrimp paste (available in jars at Asian stores)
  • 2 Tbsp. fish sauce
  • 2-3 Tbsp. palm or brown sugar, or more to taste
  • 1/2 to 1 tsp. tamarind paste (available at Asian or Indian food stores)
  • 1+1/2 Tbsp. lime juice
  • 2 Tbsp. water

Preparation:

  • Preparation Tips: Although traditionally the shallots and garlic are finely chopped by hand, you can also use a food processor for this task. Just be sure not to over-process, or you will end up with a mushy mess. What you want are individual-looking pieces of shallot and garlic.
  • If Using Whole Dried Chilies: simply place them in a coffee grinder (or food processor) and blitz until you get a powdery consistency.
  1. Heat oil in a small frying pan over medium-high heat. Add the chopped shallots and garlic, frying until they turn a very light golden brown and slightly crispy (2-3 minutes). Tip: try not to over-brown the garlic, or it will turn bitter.
  2. Remove garlic and shallots with a slotted spoon from the oil and set in a bowl to cool. Leave remaining oil in the pan.
  3. Using a pestle & mortar OR food processor/mini-chopper, combine the prepared chili with the shrimp paste, fish sauce, sugar, tamarind, lime, and water. Also add the fried garlic and shallots.
  4. Pound or process all together to form a thick paste. Return this paste to your frying pan and stir it into the oil over low heat, gently simmering until you get a fairly even consistency. Adjust the consistency by adding a little more water if you find it too thick, or more oil if you prefer a "shinier" sauce.
  5. Adjust the taste, adding more fish sauce if you'd like it saltier, or more sugar if you'd like it sweeter (I usually end up adding another 1/2 Tbsp. of fish sauce and another Tbsp. of brown sugar to mine).
  6. Nam Prik Pao will keep for several months stored in a covered jar in your refrigerator. Use your Nam Prik Pao as an addition to Thai soups, or added as a flavor booster to Thai stir-fries and curry sauces. Also wonderful when stir-fried with seafood, or as an accompaniment to noodles. Enjoy!
*Health Tip: If you have a sensitive stomach, inflammation of the stomach (as I do), or heartburn (acid reflux), I highly recommend using cayenne pepper instead of Thai bird's eye chilies or other type, as suggested in the ingredients list. Unlike most types of chili, cayenne helps heal the stomach. It's also easier to use in the sense that it's already ground. OR you can use your own fresh cayenne from your garden or local market. For more on cayenne, see: Health Benefits of Cayenne Pepper.

Saturday, January 22, 2011

Easy Baked Coconut Shrimp

This Easy Baked Coconut Shrimp recipe is great if you're looking to make something special to serve as an appetizer or finger food, but don't want to spend too long making it. Unlike most coconut shrimp recipes which are deep-fried, this one is easily baked up in the oven, which means less fat and calories. Excellent served with Thai sweet chili sauce (available in most supermarkets in the Asian section), or for an extra tropical treat, serve them with my Easy Mango Dip (see below). ENJOY!

Prep Time: 15 minutes

Cook Time: 15 minutes

Total Time: 30 minutes

Ingredients:

  • MAKES 18-24 Coconut Shrimp
  • 18-24 medium to large raw shrimp, butterflied (tails can be left on)
  • 1/2 cup dry shredded/flaked coconut (baking type)
  • 2-3 eggs
  • COATING MIX:
  • 1/2 Panko (Japanese breadcrumbs), OR any dry refined breadcrumbs (*see below for gluten-free diets)
  • 1/2 tsp. salt
  • 1 tsp. onion powder
  • 1 tsp. garlic salt
  • 1/2 tsp. cayenne pepper OR dried crushed chili
  • 1 tsp. white sugar
  • pinch white pepper (optional)

Preparation:

For Fried Coconut Shrimp, see my: Thai Fried Coconut Shrimp Recipe .
  1. Preheat oven to 425 degrees. Also prepare a baking sheet by spraying it with cooking oil, or covering it with parchment paper.
  2. Stir the Coating Mix ingredients together in a bowl. Set aside.
  3. In another smaller bowl, lightly beat 2 eggs. In a third bowl, place the shredded/flaked coconut.
  4. Holding the shrimp by their tails, dip first into the beaten egg, then in the panko mix to lightly coat, then dip back in the egg, and finally roll in the coconut. Lay the shrimp on its side on your prepared baking sheet. Depending on the size and number of shrimp you're making, you may need to use one more egg. Tip: Since they are going to be baked, avoid over-coating, or your shrimp will be flat on one side.
  5. Bake on the middle rack at 425 degrees for 15 minutes, or until coconut is lightly toasted (light golden-brown). Turn the shrimp halfway through baking.
  6. Serve with with my Mango Coconut Dip (as shown), OR Thai sweet chili sauce (available at most supermarkets in the Asian section). ENJOY!

Thai Barbeque Ribs

This special Thai Barbecue Ribs recipe turns out tangy-sticky good! Based on Chinese barbeque ribs, this Thai version is even more flavorful and tender. The marinade/bbq sauce is very easy to stir together, then just grill up the ribs for a special dinner treat everyone in the family will love. These ribs also makes for a great party finger food. ENJOY!

Prep Time: 15 minutes

Cook Time: 20 minutes

Total Time: 35 minutes

Ingredients:

  • 1.5 lbs. (0.65 kg.) pork ribs, back or side (SERVES 2-3)
  • 4 Tbsp. oyster sauce (I used Golden Dragon brand)
  • 2 Tbsp. soy sauce
  • 1 Tbsp. fish sauce (available in tall bottles at Asian food stores)
  • 1 Tbsp. black Chinese vinegar (or substitute regular white or apple cider vinegar)
  • 1 Tbsp. dark soy sauce
  • 1/4 cup syrup (I used real maple syrup)
  • 5 cloves garlic, minced
  • 1 thumb-size piece galangal OR ginger, grated
  • Optional: 1 fresh red chili, minced, OR 1/2 tsp. cayenne pepper, OR 1-2 tsp. chili sauce (to taste)
  • Garnish: 2 spring onions, finely sliced

Preparation:

  1. Cut the ribs into easy-to-eat segments and place in a large bowl.
  2. Place all remaining ingredients (except the garnish) together in a sauce pan. Stir well to dissolve the syrup.
  3. Pour half of this sauce over the ribs. Stir well to coat and place ribs in the refrigerator to marinate 15-20 minutes (or up to 24 hours).
  4. Cook ribs over a medium-hot grill, brushing over any leftover marinade from the bottom of the bowl for the first couple of turns. Grill until well done (meat near the bone should be white for very light pink). Tip: Medium heat for a longer period is better, otherwise the ribs may burn on the outside while reamining uncooked on the inside.
  5. Warm up the reserved sauce and serve together with the ribs (this sauce is excellent over rice). Sprinkle the spring onion over the ribs and ENJOY!
  6. Oven Instructions: If the weather doesn't cooperate, place marinated ribs in a covered casserole dish. Bake 45 minutes at 350. Then transfer ribs to a foil-lined baking sheet. Brush with some of the reserved sauce and place the sheet under the broiler. Broil 5-7 minutes, or until ribs are dark and sticky on the outside and tender inside. Warm up the remaining sauce and serve together with rice.